I have a really good customer, Rick at
Lance Gamma who needs custom motorcycle parts all the time. This time his project is an old Norton 850 Commando.
 |
| 1975 Norton 850 Commando Electric |
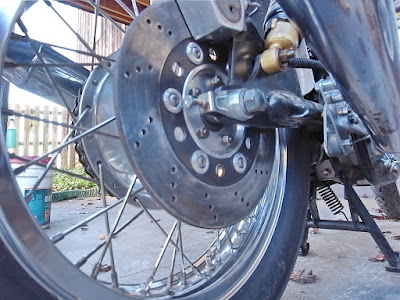
The previous owner installed a wider rear rim and spoke set which resulted in the wheel being not centered properly.
 |
| Poorly centered rear wheel |
Rick's has access to more shop services ( like DMD ), so he envisioned a fix for the problem that required some customizing of the factory brake rotor.
 |
| Original integrated brake rotor and adapter |
 |
| Removing the center wheel interface from the rotor |
His idea involved designing and manufacturing a custom brake rotor hub with the proper offset. The factory rotor is a one-piece cast iron unit with an integrated rotor and wheel mount interface. The first step in the project was to remove the existing wheel interface. The above pic shows the rotor center being milled out. Below is the rotor with the center milled away.
 |
| Center milled out of rotor |
The center was milled out to a diameter of 4.500in which allowed for the entire center to clean up nicely. The design of the new system calls for the large diameter hole pattern in the center web to be used as driving features for the rotor. While the rotor was positioned, the centers of the holes were located to get the hole pattern information. Unfortunately, it was found out that the holes were only generally located in a circular pattern. It was decided that they should be opened up and centered in a properly spaced pattern.
 |
| 6 holes opened up in rotor |
The new assembly was then drawn up in SolidWorks. From the outside, the shape of the new assembly resembles the shape of the original cast piece.
 |
| Rotor Assembly |
The new design is a simple one with very straightforward features. Since this is not a piece going on a $150k vehicle, it was necessary to keep manufacturing costs low.
 |
| New center hub |
Since I was all out of 7in diameter round stock, the part had to be machined from a piece of plate. Two dowel pin holes were added to the bolt circle and were drilled and reamed into the plate along with the 5 fastener holes.


No comments:
Post a Comment